centos7.6自定义安装mongodb Enterprise4.2.0?
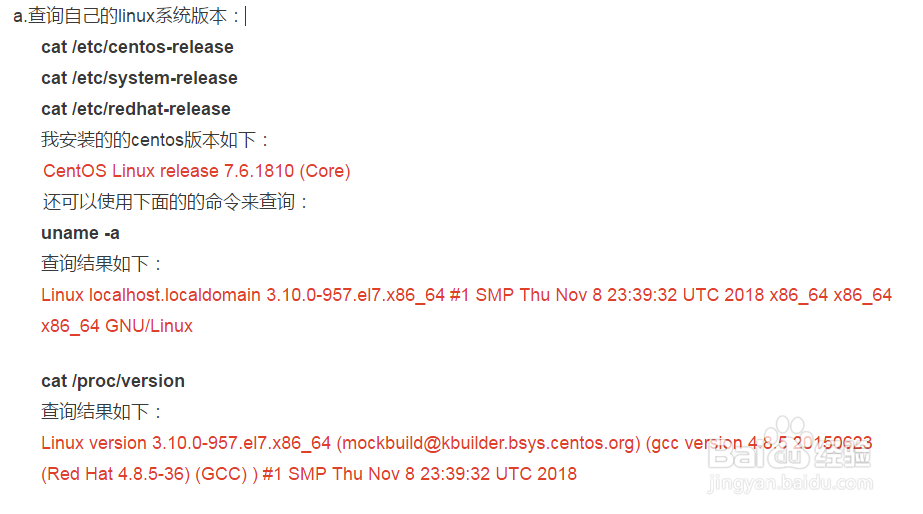
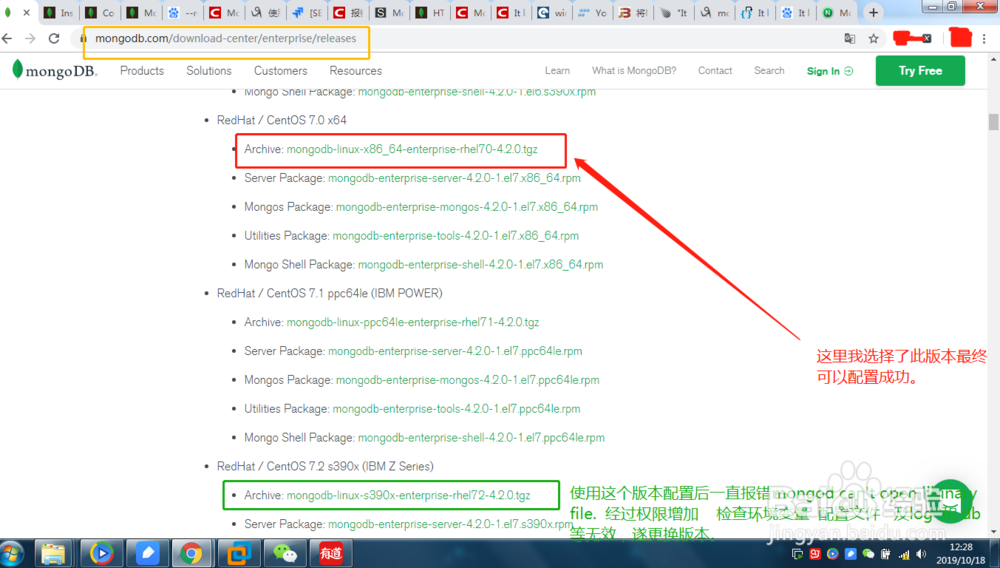
1、查看虚拟机内核版本并下载对应版本。
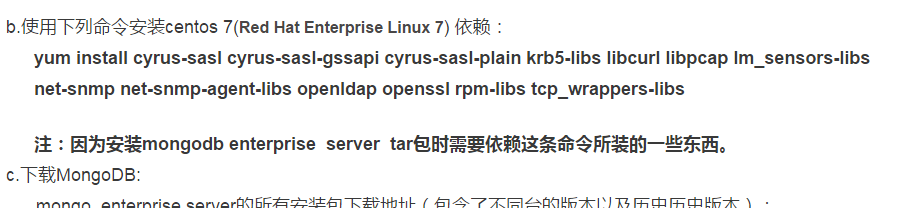
1)shell中输入命令下载依赖:
yum install cyrus-sasl cyrus-sasl-gssapi cyrus-sasl-plain krb5-libs libcurl libpcap lm_sensors-libs net-snmp net-snmp-agent-libs openldap openssl rpm-libs tcp_wrappers-libs
注:因为安装mongodb enterprise server tar包时需要依赖这条命令所装的一些东西
2)下载压缩包。
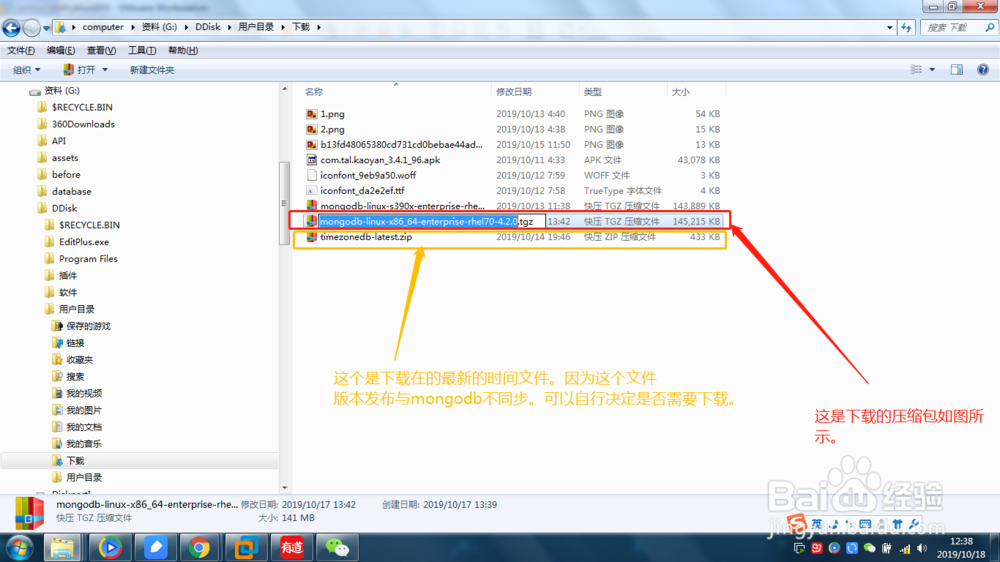
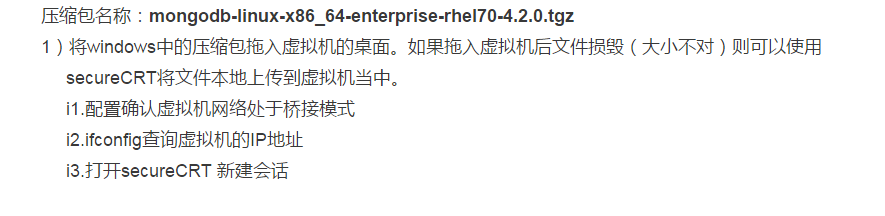
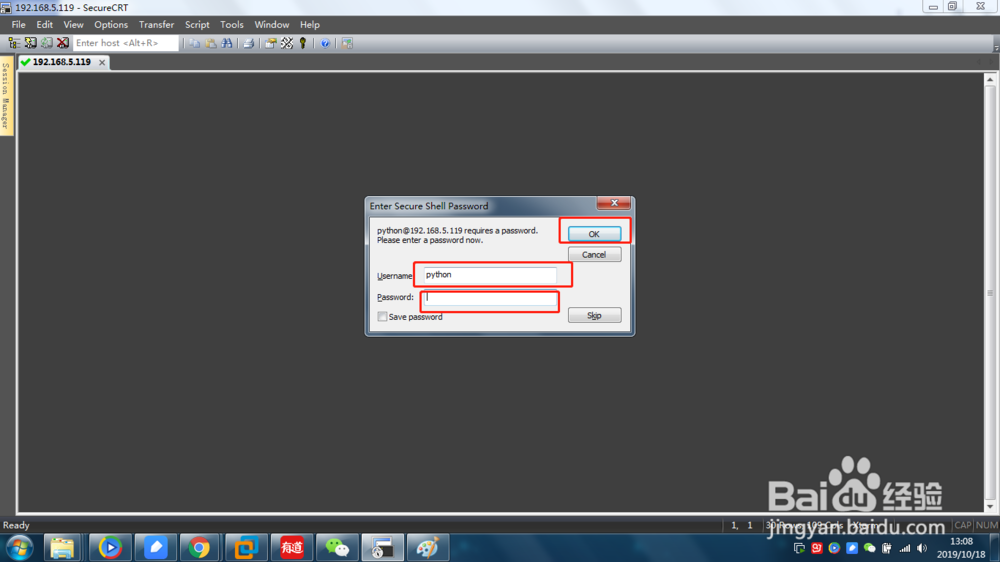
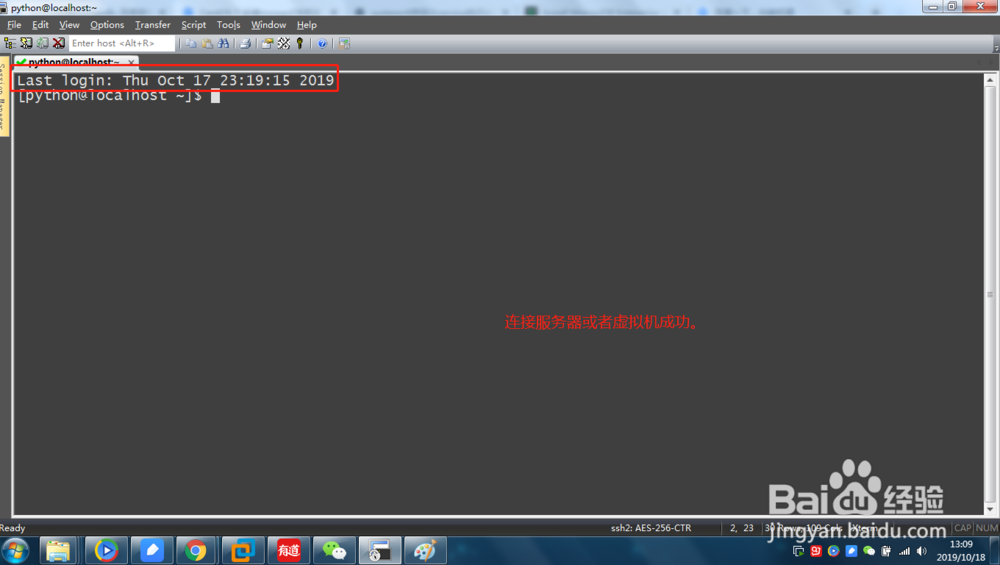
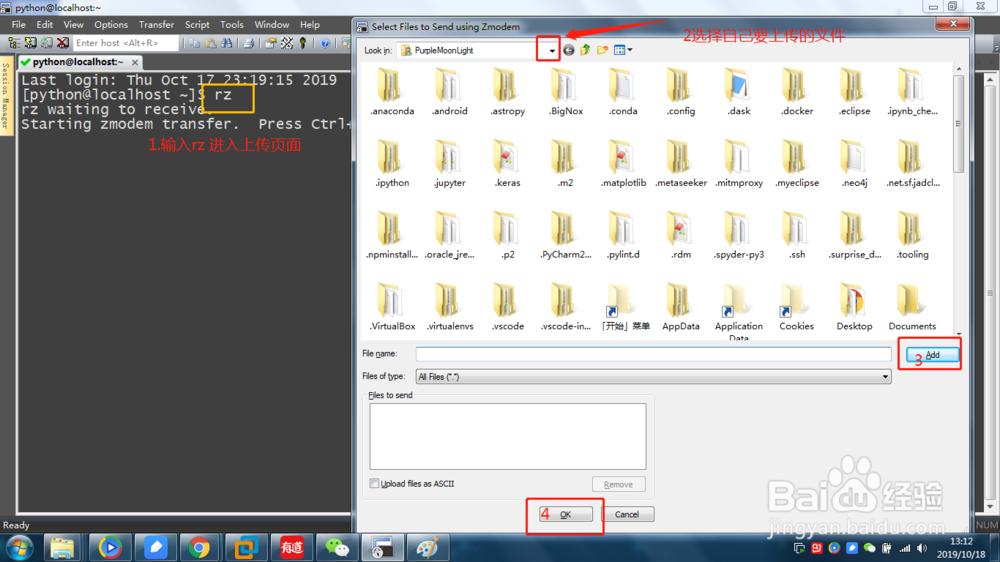
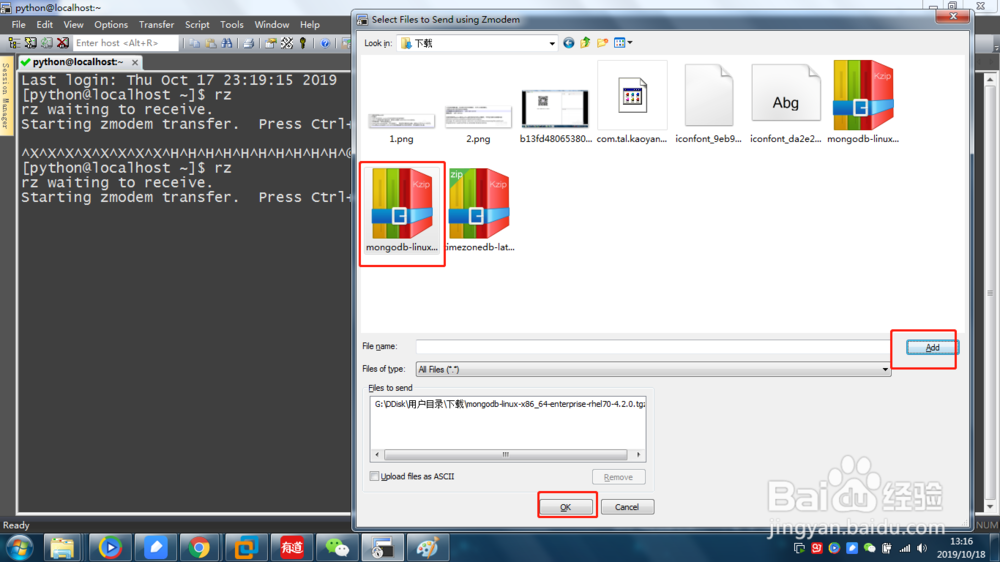
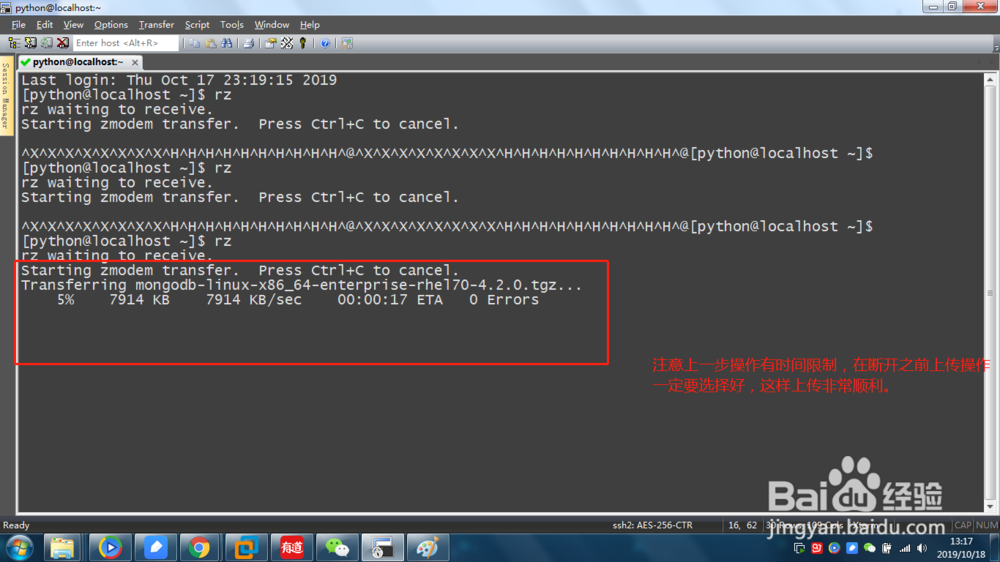
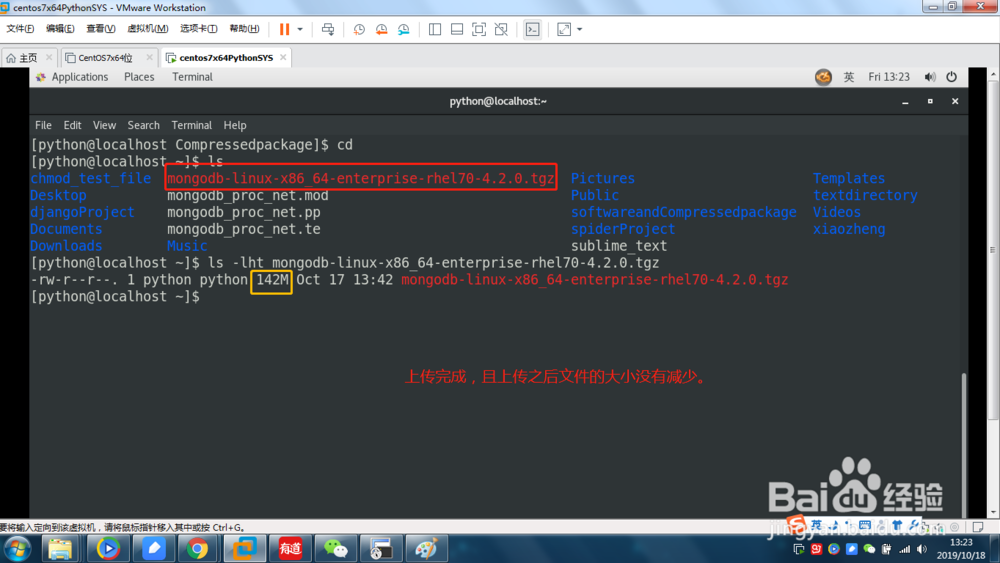
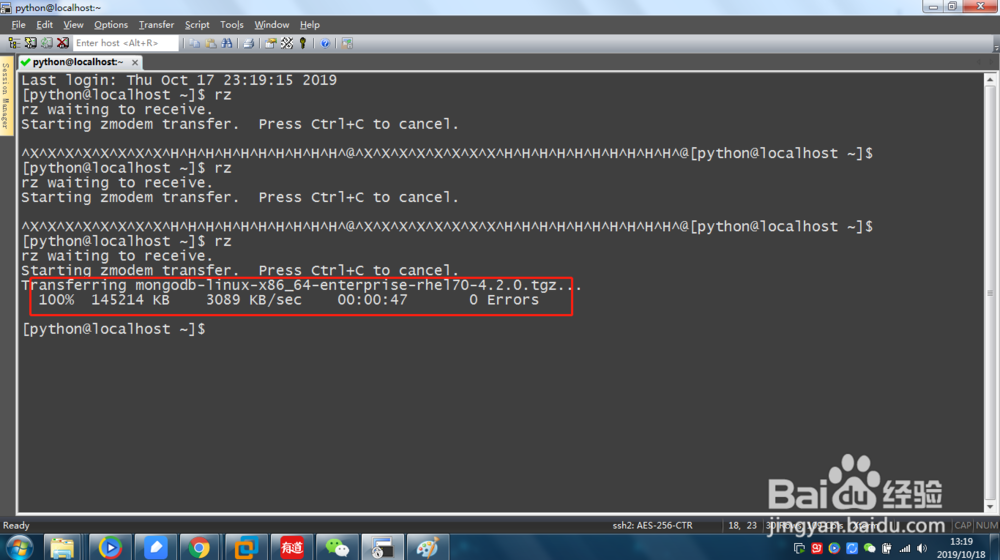
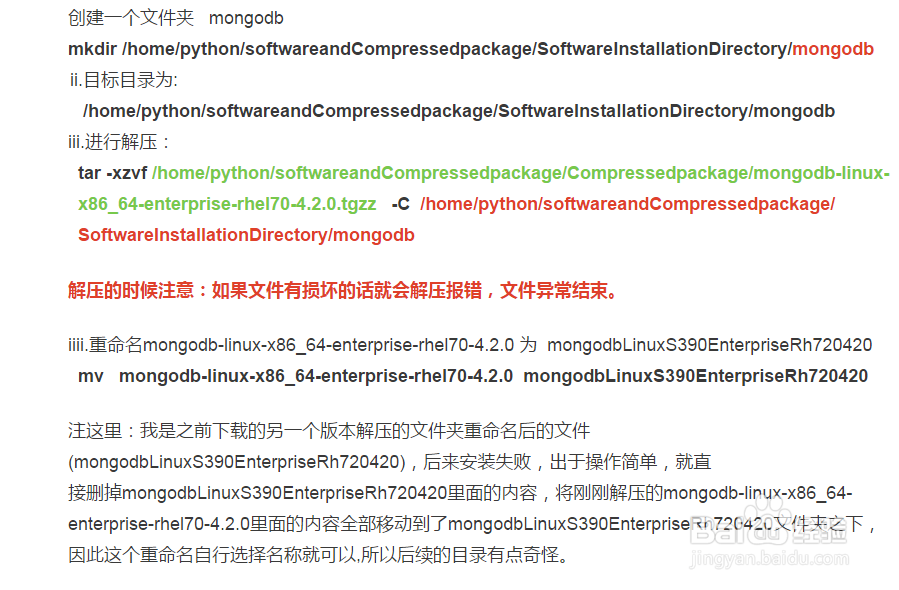
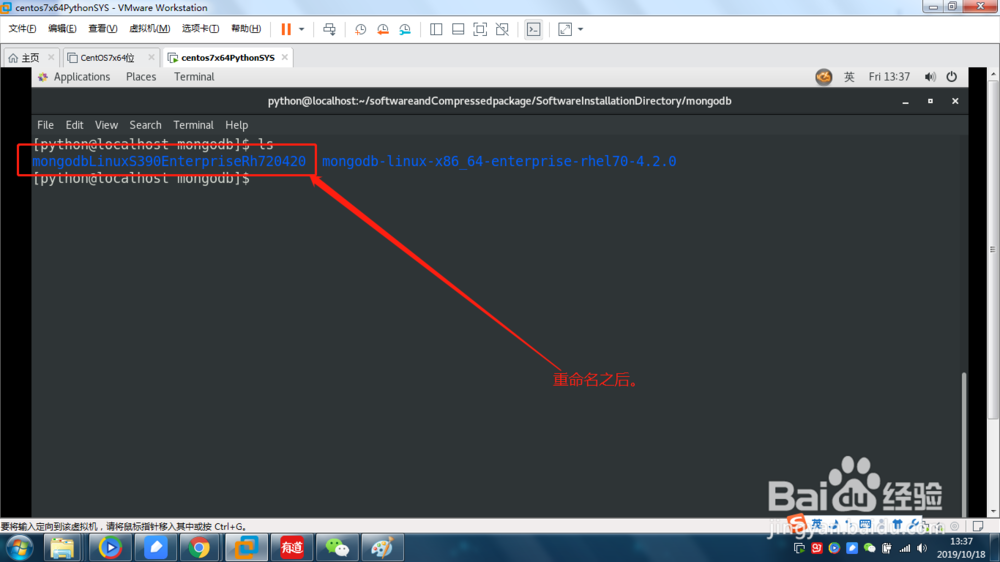
2、将压缩包从本地传入到虚拟机中。

3、创建存放目录。

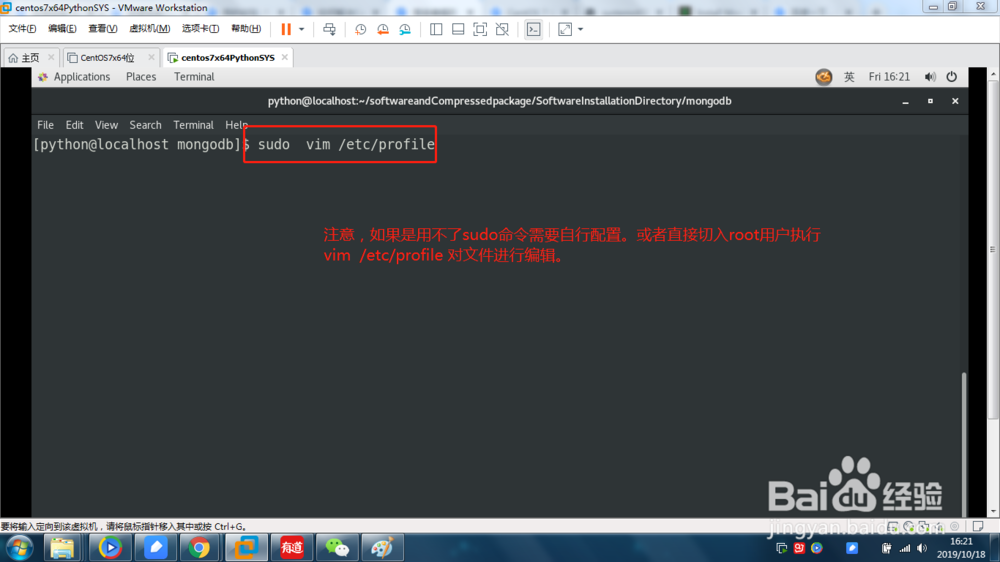
4、配置环境变量。
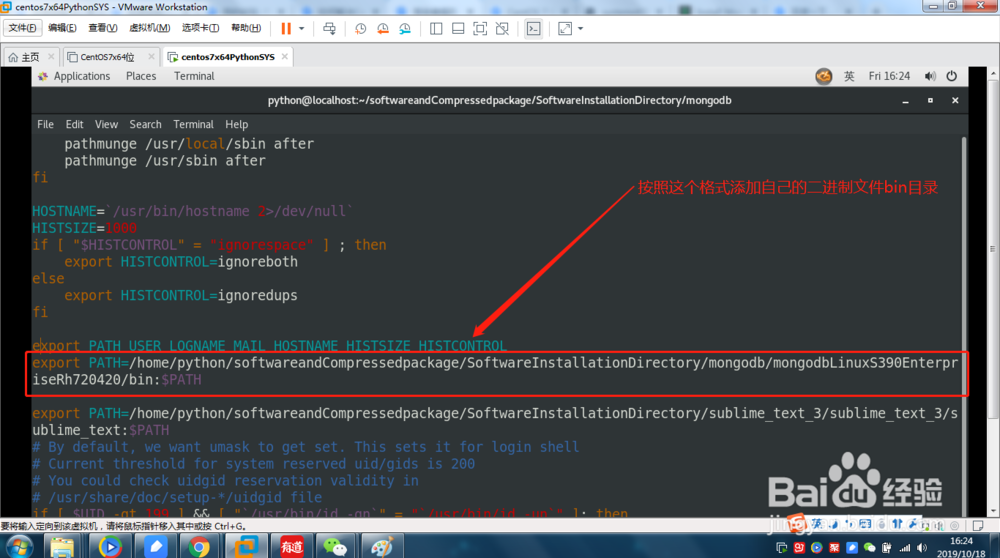
在 /etc/profile 文件中添加环境变量:
export PATH=/home/python/softwareandCompressedpackage/SoftwareInstallationDirectory/mongodb/mongodbLinuxS390EnterpriseRh720420/bin:$PATH
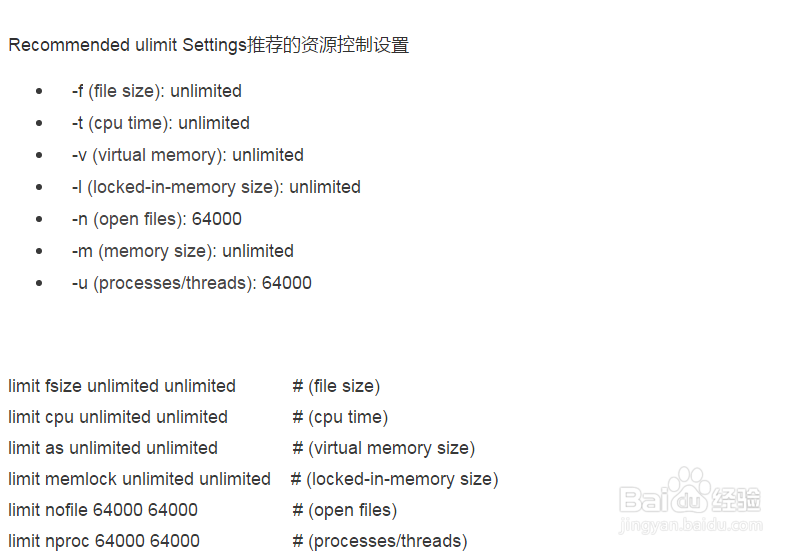
5、UNIX ulimit Settings (这里可不做配置) 不过需要注意的是虚拟机的内存设置大些 >2G
有兴趣这里根据个人的情况进行数据的配置。
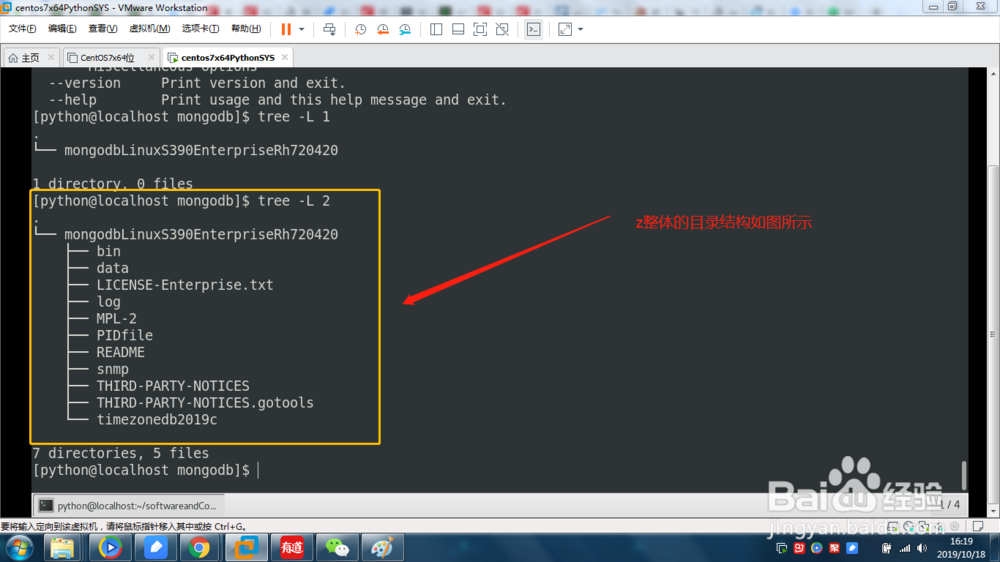
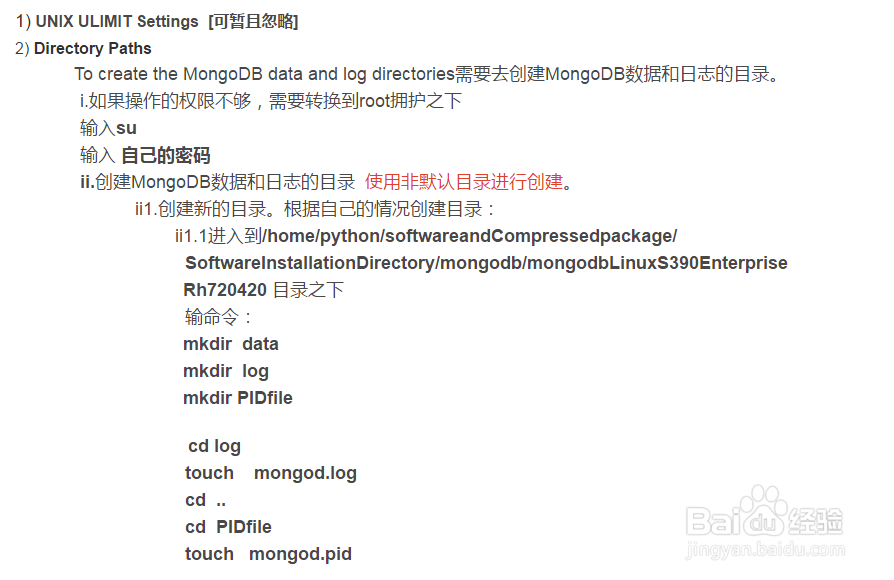
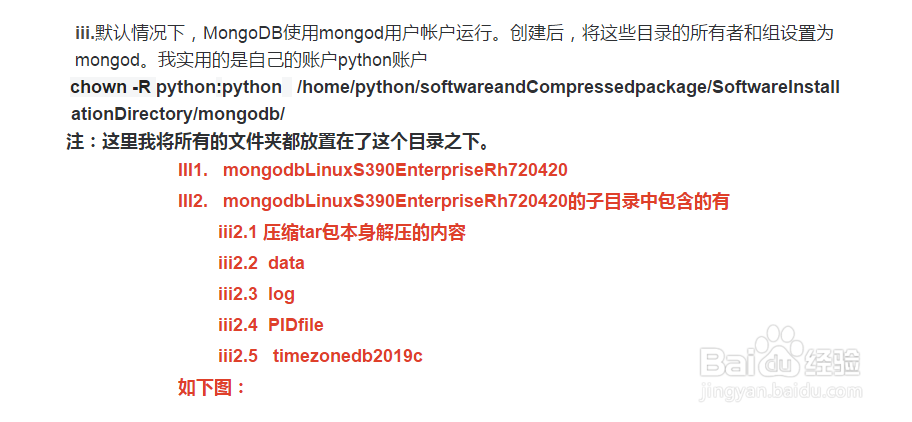
6、创建数据存放目录,日志存放目录,PID文件目录。
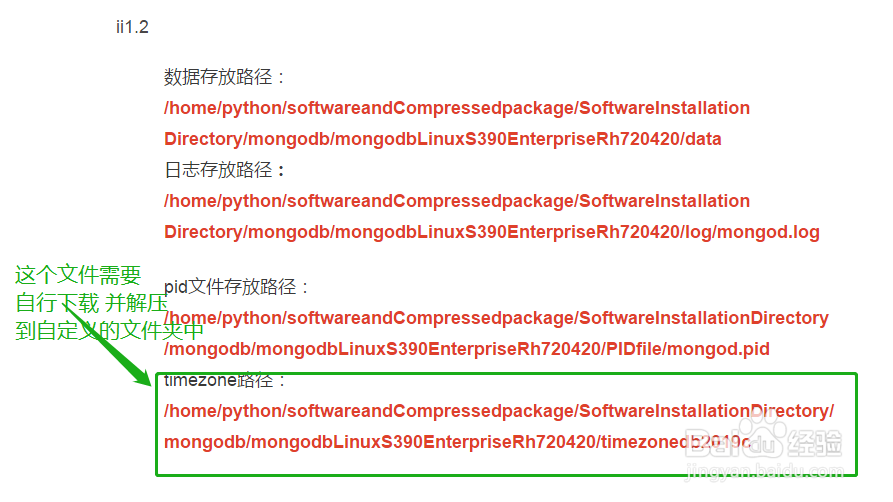
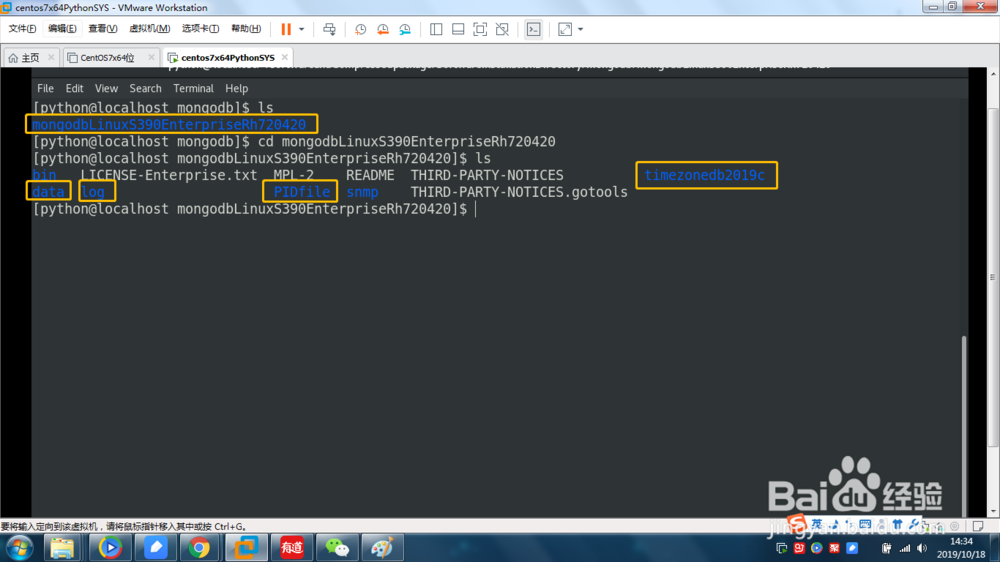
进入到/home/python/softwareandCompressedpackage/SoftwareInstallationDirectory/mongodb/mongodbLinuxS390EnterpriseRh720420 目录之下
输命令令:
mkdir data
mkdir log
mkdir PIDfile
cd log
touch mongod.log
cd ..
cd PIDfile
touch mongod.pid
7、权限设置。
8、Configure SELinux(配置SELinux)
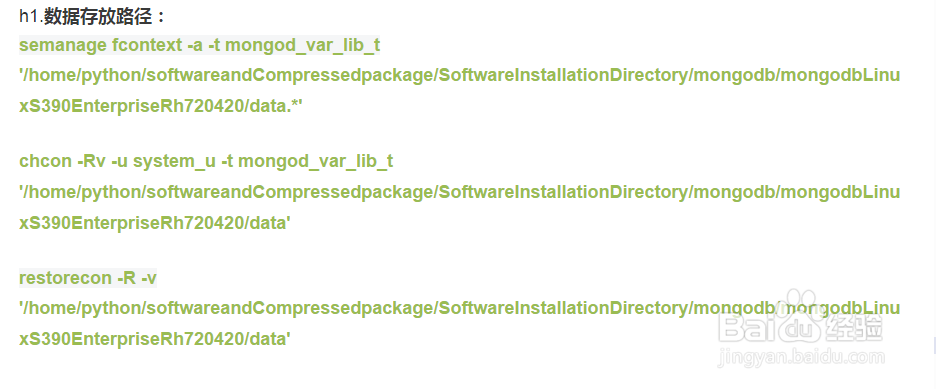
h1.数据存放路径:
semanage fcontext -a -t mongod_var_lib_t '/home/python/softwareandCompressedpackage/SoftwareInstallationDirectory/mongodb/mongodbLinuxS390EnterpriseRh720420/data.*'
chcon -Rv -u system_u -t mongod_var_lib_t '/home/python/softwareandCompressedpackage/SoftwareInstallationDirectory/mongodb/mongodbLinuxS390EnterpriseRh720420/data'
restorecon -R -v '/home/python/softwareandCompressedpackage/SoftwareInstallationDirectory/mongodb/mongodbLinuxS390EnterpriseRh720420/data'
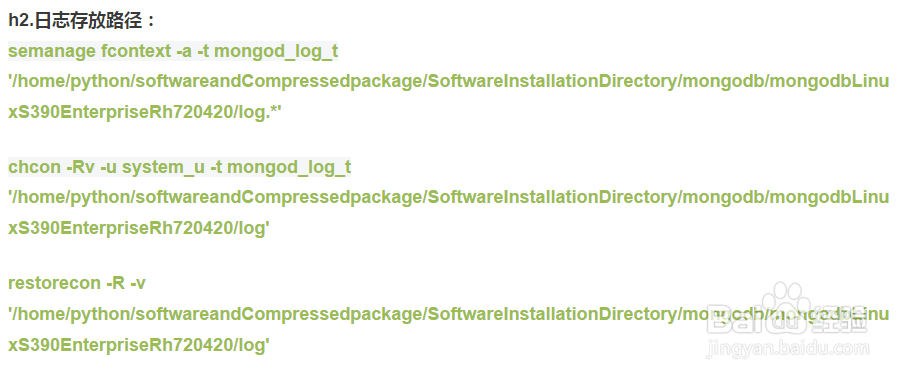
h2.日志存放路径:
semanage fcontext -a -t mongod_log_t '/home/python/softwareandCompressedpackage/SoftwareInstallationDirectory/mongodb/mongodbLinuxS390EnterpriseRh720420/log.*'
chcon -Rv -u system_u -t mongod_log_t '/home/python/softwareandCompressedpackage/SoftwareInstallationDirectory/mongodb/mongodbLinuxS390EnterpriseRh720420/log'
restorecon -R -v '/home/python/softwareandCompressedpackage/SoftwareInstallationDirectory/mongodb/mongodbLinuxS390EnterpriseRh720420/log'
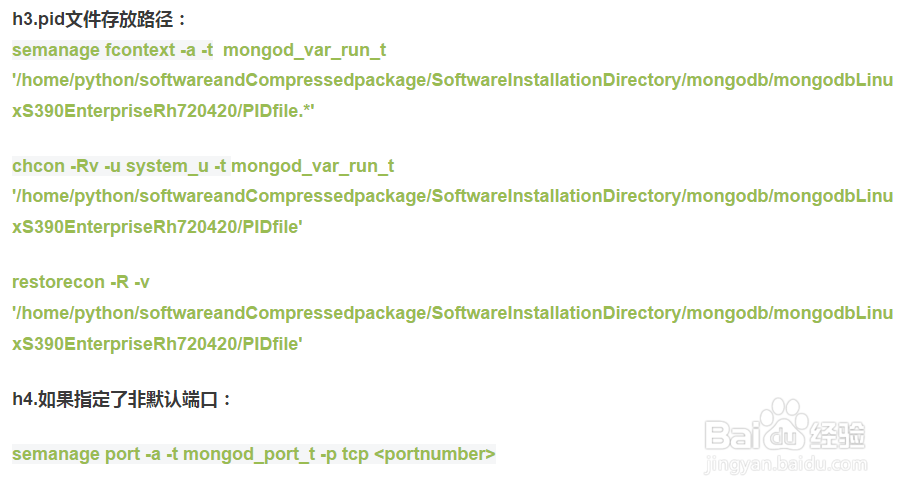
h3.pid文件存放路径:
semanage fcontext -a -t mongod_var_run_t '/home/python/softwareandCompressedpackage/SoftwareInstallationDirectory/mongodb/mongodbLinuxS390EnterpriseRh720420/PIDfile.*'
chcon -Rv -u system_u -t mongod_var_run_t '/home/python/softwareandCompressedpackage/SoftwareInstallationDirectory/mongodb/mongodbLinuxS390EnterpriseRh720420/PIDfile'
restorecon -R -v '/home/python/softwareandCompressedpackage/SoftwareInstallationDirectory/mongodb/mongodbLinuxS390EnterpriseRh720420/PIDfile'
h4.如果指定了非默认端口:
semanage port -a -t mongod_port_t -p tcp <portnumber>
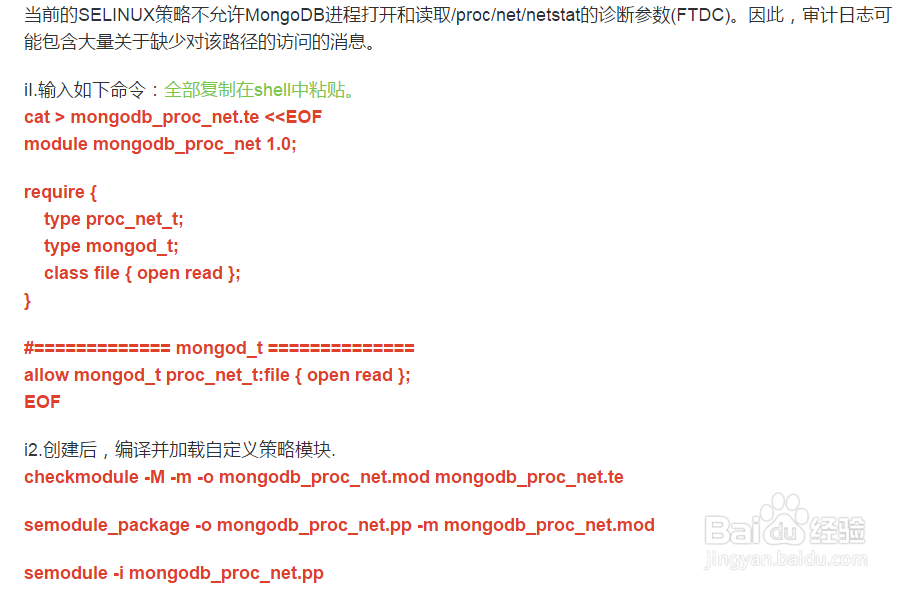
9、Optional. Suppress FTDC Warnings的配置
iI.输入如下命令:全部复制在shell中粘贴。
cat > mongodb_proc_net.te <<EOF
module mongodb_proc_net 1.0;
require {
type proc_net_t;
type mongod_t;
class file { open read };
}
#============= mongod_t ==============
allow mongod_t proc_net_t:file { open read };
EOF
i2.创建后,编译并加载自定义策略模块.
checkmodule -M -m -o mongodb_proc_net.mod mongodb_proc_net.te
semodule_package -o mongodb_proc_net.pp -m mongodb_proc_net.mod
semodule -i mongodb_proc_net.pp
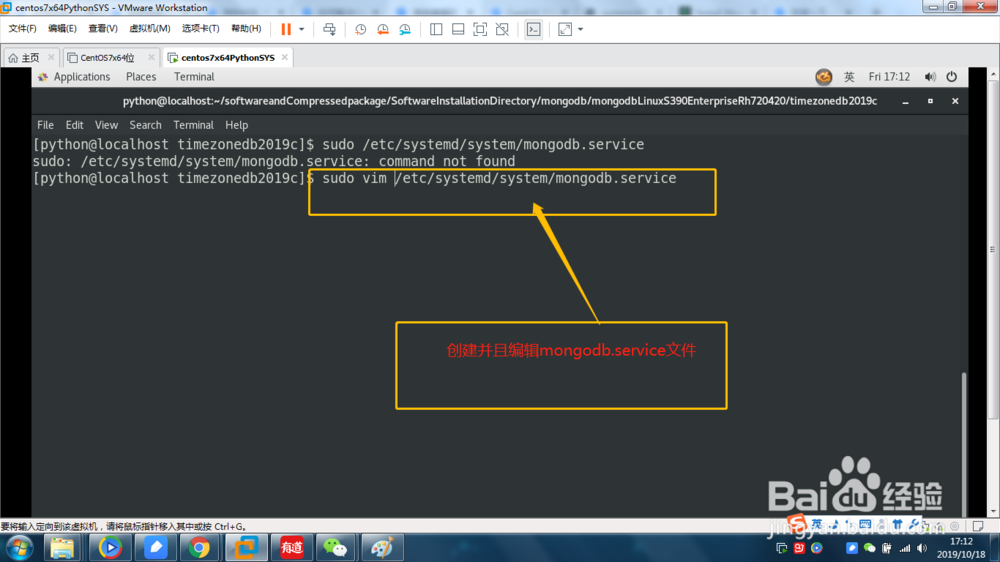
10、创建mongodb.service文件。
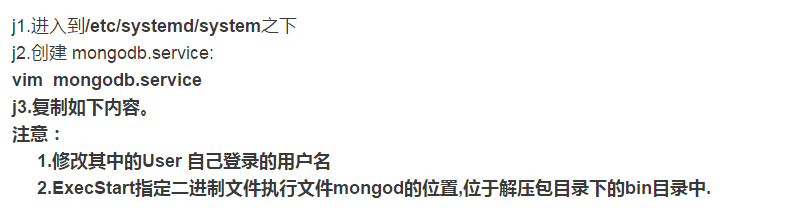
j1.进入到/etc/systemd/system之下
j2.创建 mongodb.service:
vim mongodb.service
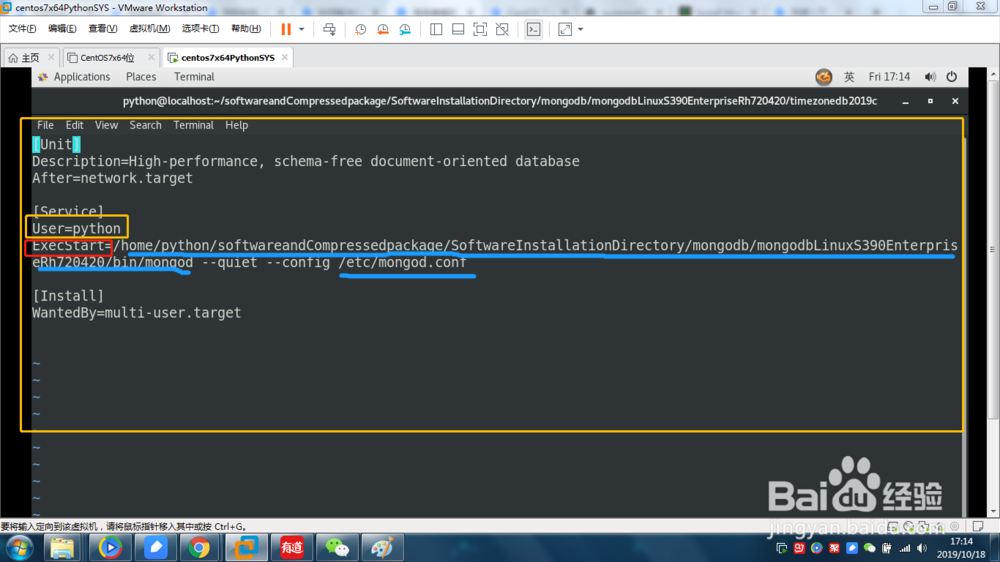
j3.复制如下内容。
注意:
1.修改其中的User 自己登录的用户名
2.ExecStart指定二进制文件执行文件mongod的位置,位于解压包目录下的bin目录中.
[Unit]
Description=High-performance, schema-free document-oriented database
After=network.target
[Service]
User=python
ExecStart=/home/python/softwareandCompressedpackage/SoftwareInstallationDirectory/mongodb/mongodbLinuxS390EnterpriseRh720420/bin/mongod --quiet --config /etc/mongod.conf
[Install]
WantedBy=multi-user.target
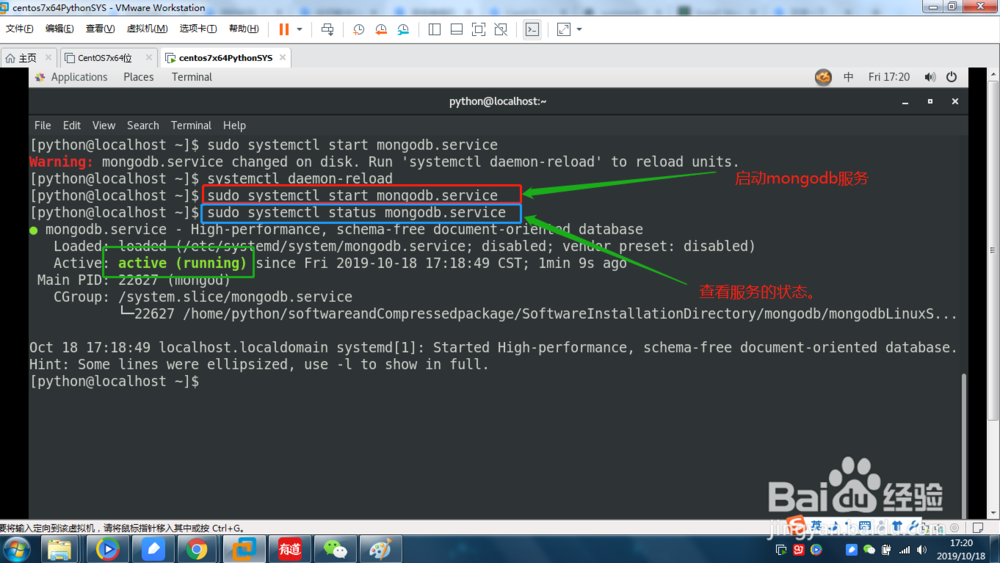
11、Run MongoDB Enterprise运行MongoDB.
k1.启动mongodb服务
sudo systemctl start mongodb.service
k2.查看mongodb服务的状态。
sudo systemctl status mongodb.service
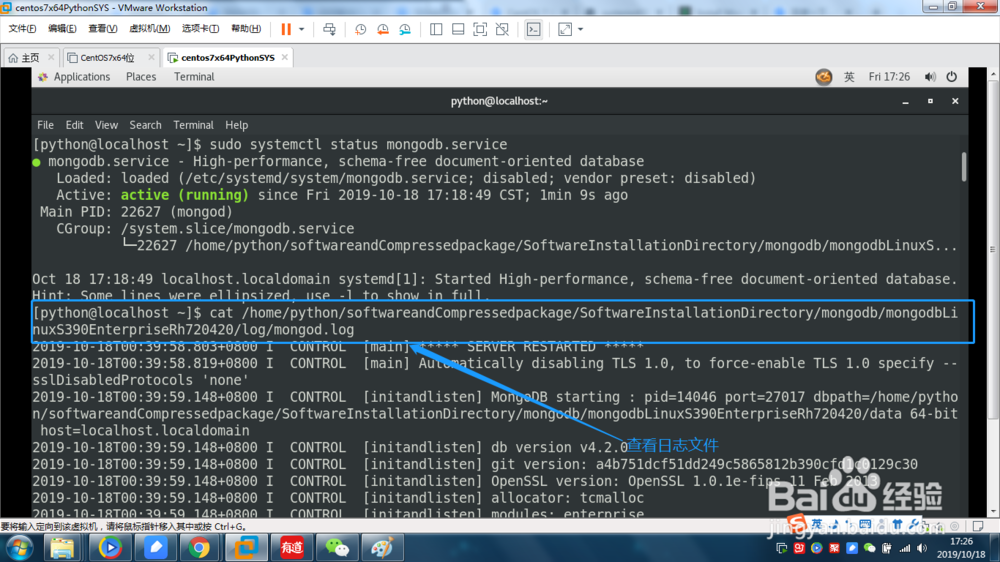
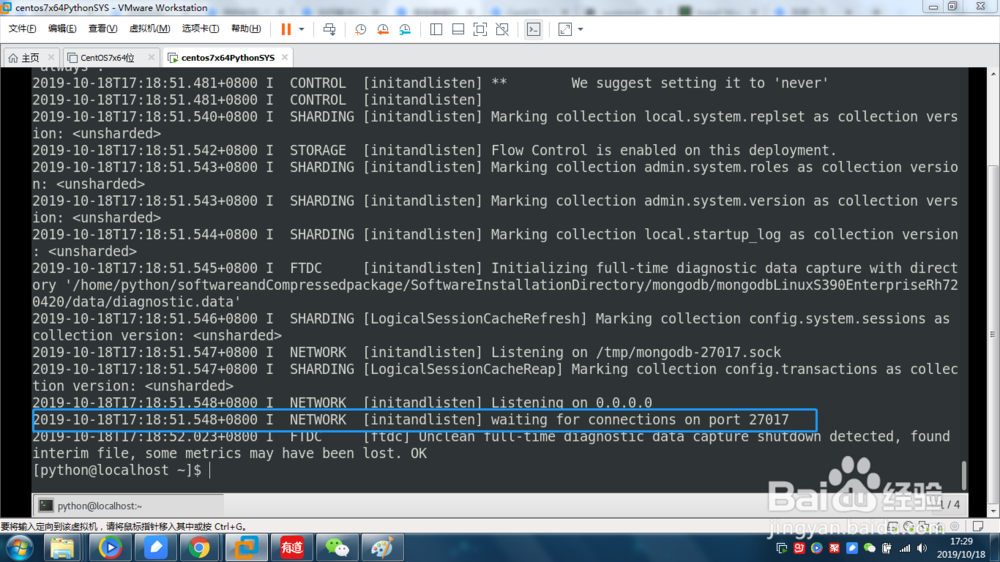
k3.也可以查询日志验证MongoDB已经成功启动
进入自己的日志目录进行查看:
看到这里说明已经启动成功
[initandlisten] waiting for connections on port <port>
k4.您可以选择通过发出以下命令来确保MongoDB将在系统重新启动后启动
sudo chkconfig mongod on
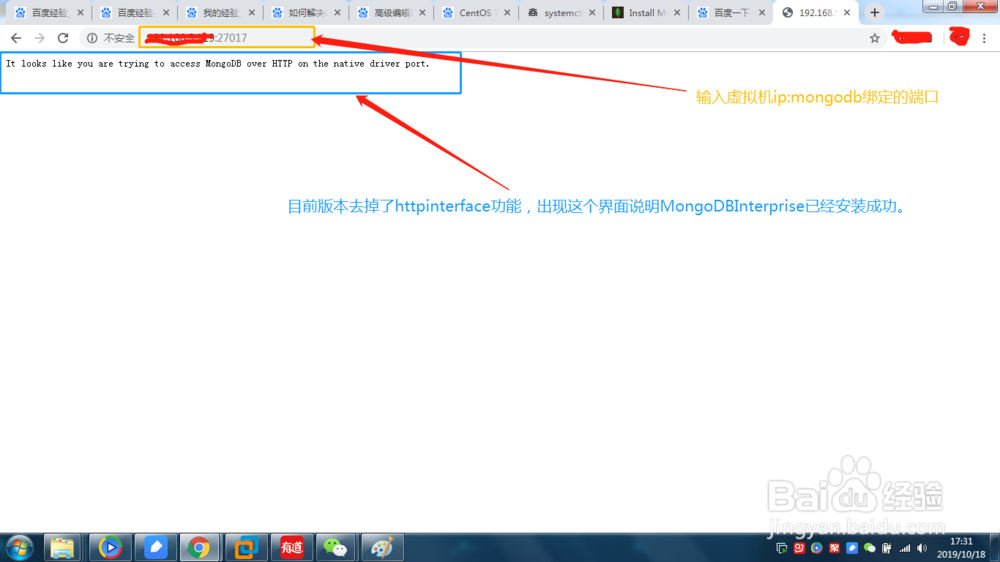
12、浏览器访问。