使用docker版jenkins部署dotnetcore应用
1、Dockerfile
FROM jenkins/jenkins# Switch to root to install .NET Core SDKUSER root# Show distro information!RUN uname -a && cat /etc/*release# Based on instructiions at https://www.microsoft.com/net/download/linux-package-manager/debian9/sdk-current# Install dependency for .NET Core 2RUN apt-get updateRUN apt-get install -y curl libunwind8 gettext apt-transport-https# Based on instructions at https://www.microsoft.com/net/download/linux-package-manager/debian9/sdk-current# Install microsoft.qpgRUN curl https://packages.microsoft.com/keys/microsoft.asc | gpg --dearmor > microsoft.gpgRUN mv microsoft.gpg /etc/apt/trusted.gpg.d/microsoft.gpgRUN sh -c 'echo "deb [arch=amd64] https://packages.microsoft.com/repos/microsoft-debian-stretch-prod stretch main" > /etc/apt/sources.list.d/dotnetdev.list'# Install the .NET Core frameworkRUN apt-get updateRUN apt-get install -y dotnet-sdk-2.1.4# Switch back to the jenkins user.USER jenkins
为了方面我已经把配置信息放到了github上大家可以访问直接使用
https://github.com/YahuiWong/jenkins-dotnet-core
使用步骤
初始化docker环境
git clone https://github.com/YahuiWong/jenkins-dotnet-core.gitcd jenkins-dotnet-coresh init.shdocker-compose up -d
初始化配置jenkins
Open ip:8080 on the browser
vi jenkins_home/secrets/initialAdminPassword & Set the initialAdminPassword string to your jenkins page
至此安装完毕。
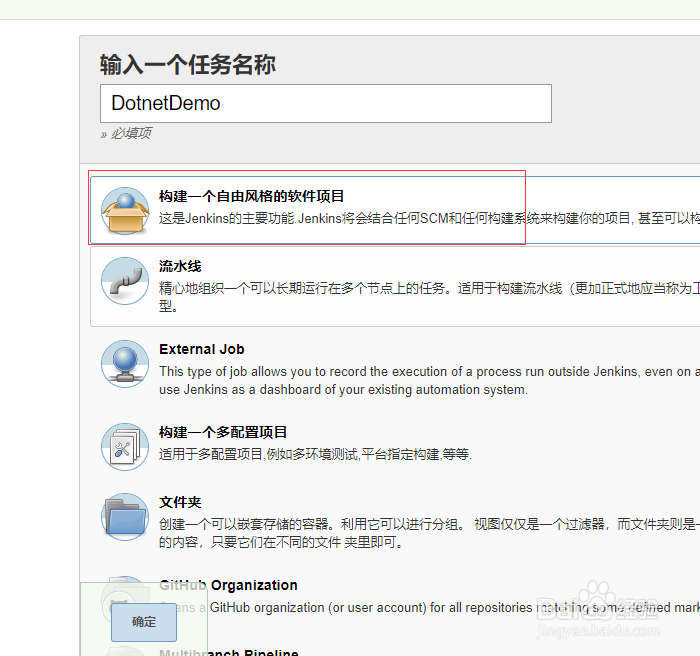
配置jenkins构建dotent core的任务
构建一个自由风格的软件项目
2、配置源码管理资料
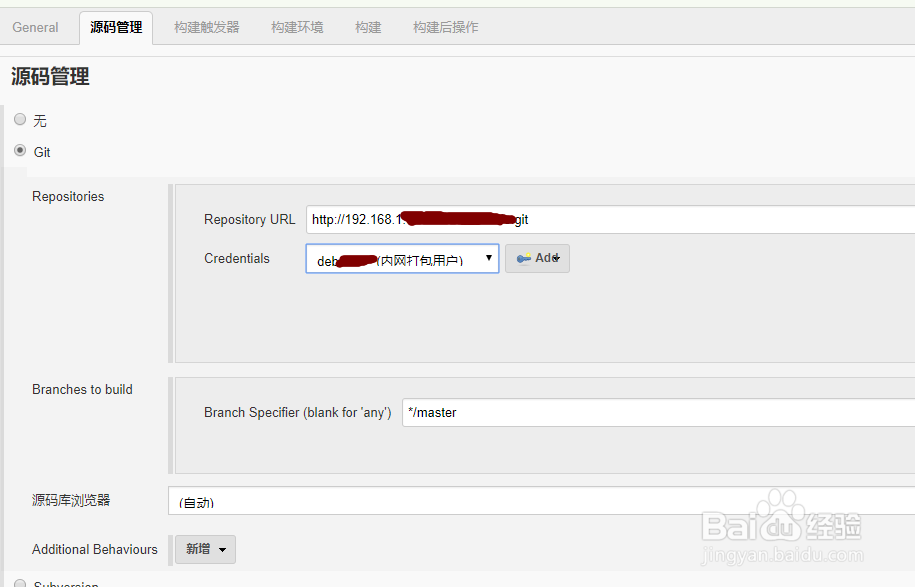
3、注意:初次配置的话 需要在 添加一个可以访问代码地址的 Credentials
配置构建脚本
如下图步骤添加打包脚本
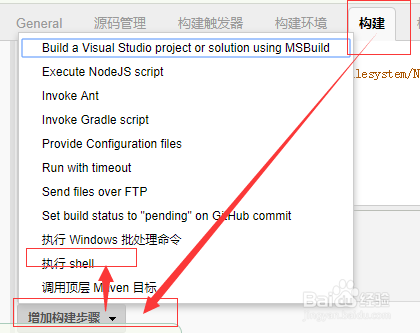
4、打包脚本示例
echo '============查看打包环境================' pwdlsecho $PATHwhoamiwhich dotnetdotnet --infodotnet --versionecho '============================begin restore======================================='dotnet restoreecho '============================end restore======================================='echo '============================cd project======================================='cd ./您的项目路径echo '============================begin build======================================='dotnet build # 为了生成XML注释文件 用于swagger注释rm -rf $WORKSPACE/jenkins_publishmkdir $WORKSPACE/jenkins_publishdotnet publish -c:Release -o $WORKSPACE/jenkins_publish # 如果针对给定运行时发布项目带上-r 如:-r centos.7-x64cp ./bin/Debug/netcoreapp2.0/您的项目路径.xml $WORKSPACE/jenkins_publish/ # 拷贝swagger注释echo '============================end build======================================='
配置发布途径
发布插件Publish Over FTP使用说明
我这里使用的是 jenkins的Publish Over FTP插件,安装好此插件之后在 系统管理->系统设置->Publish over FTP 里可以新增一个你要发布的ftp服务器信息。为了保证ftp可以正常连接建议尝试下右下角的Test Configuration确认success
上面我们已经配置好Publish Over FTP要用的ftp账号,新增我们新增构建后操作如下图选择此插件

5、然后选择配置好的ftp选项,配置如下所示
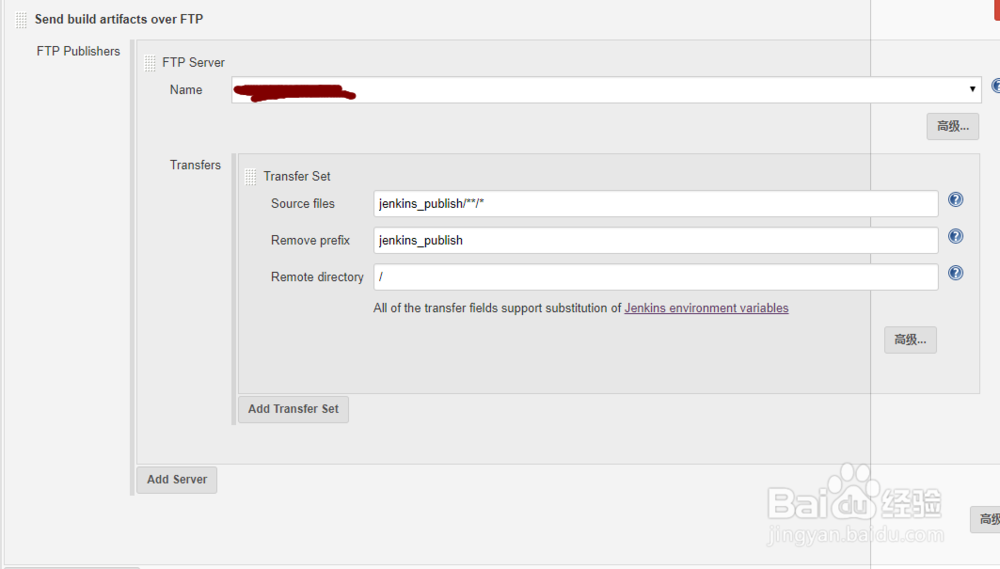
6、注意:这里的配置信息中 jenkins_publish是和打包脚本对应的
保存打包任务
立即构建
点击立即构建之后,把构建任务开始进行中
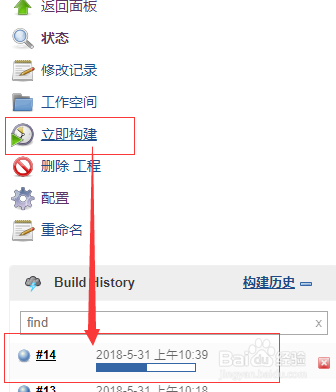
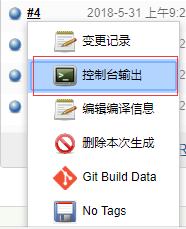
7、如果想看的实时的构建信息可以点击如下图看到控制台输出
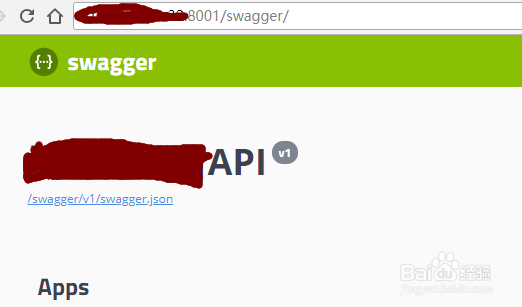
8、构建完毕
打开部署站点地址,发现站点已经运行起来了
9、重点说明
Nuget配置说明
如果您的.NET CORE项目使用的了第三方或者自建nuget服务,您需要在 配置下 jenkins_home/.nuget/NuGet/NuGet.Config的信息如我的使用了国内博客园的nuget加速地址和自建的nuget服务配置如下
<?xml version="1.0" encoding="utf-8"?><configuration> <packageSources> <add key="nuget.org" value="https://api.nuget.org/v3/index.json" protocolVersion="3" /> <add key="nuget.cnblogs.com" value="https://nuget.cnblogs.com/v3/index.json" /> <add key="dotnet.myget.org/F/aspnetcore-dev/api/v3/index.json" value="https://dotnet.myget.org/F/aspnetcore-dev/api/v3/index.json" /> <add key="192.168.1.32:9001/nuget" value="http://192.168.1.32:9001/nuget" /> </packageSources> <packageRestore> <add key="enabled" value="True" /> <add key="automatic" value="True" /> </packageRestore> <bindingRedirects> <add key="skip" value="False" /> </bindingRedirects> <packageManagement> <add key="format" value="0" /> <add key="disabled" value="False" /> </packageManagement></configuration>