如何使用Spring boot实现和发布Restful服务
1、在《使用Spring和JQuery实现视频文件的上传和播放》案例中项目的基础上增加一个Restful服务的Controller:FileServerRestController.javapackage image;import java.util.List;import java.util.stream.Collectors;import org.springframework.beans.factory.annotation.Autowired;import org.springframework.web.bind.annotation.RequestMapping;import org.springframework.web.bind.annotation.RestController;import org.springframework.web.servlet.mvc.method.annotation.MvcUriComponentsBuilder;import image.storage.StorageService;/*** 文件上传服务控制器* @author Fantasy**/@RestControllerpublic class FileServerRestController { private final StorageService storageService; @Autowired public FileServerRestController(StorageService storageService) { this.storageService = storageService; } @RequestMapping("fileList") public List<String> getFileList(String fileName) { List<String> rst = storageService.loadAll().map( path -> MvcUriComponentsBuilder.fromMethodName(FileUploadController.class, "serveFile", path.getFileName().toString()).build().toString()) .collect(Collectors.toList()); return rst; }}
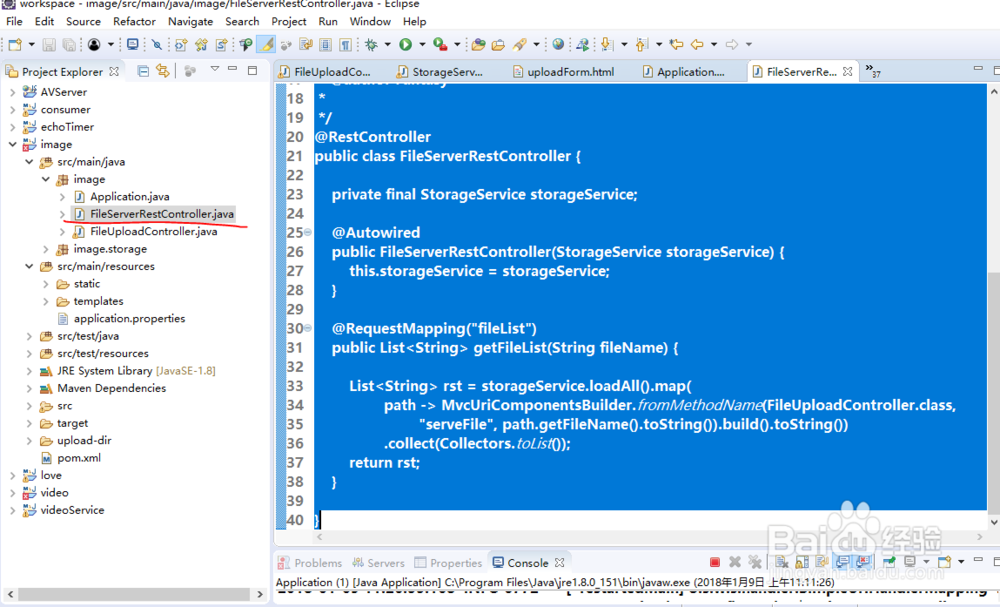
2、重点说明一下控制器的实现原理1)控制器需要使用@RestController注解, 不要使用@Controller2) Restful的访问URL地址为 /fileList ,返回值为字符串的List对象 @RequestMapping("fileList") public List<String> getFileList(String fileName) { List<String> rst = storageService.loadAll().map( path -> MvcUriComponentsBuilder.fromMethodName(FileUploadController.class, "serveFile", path.getFileName().toString()).build().toString()) .collect(Collectors.toList()); return rst; }
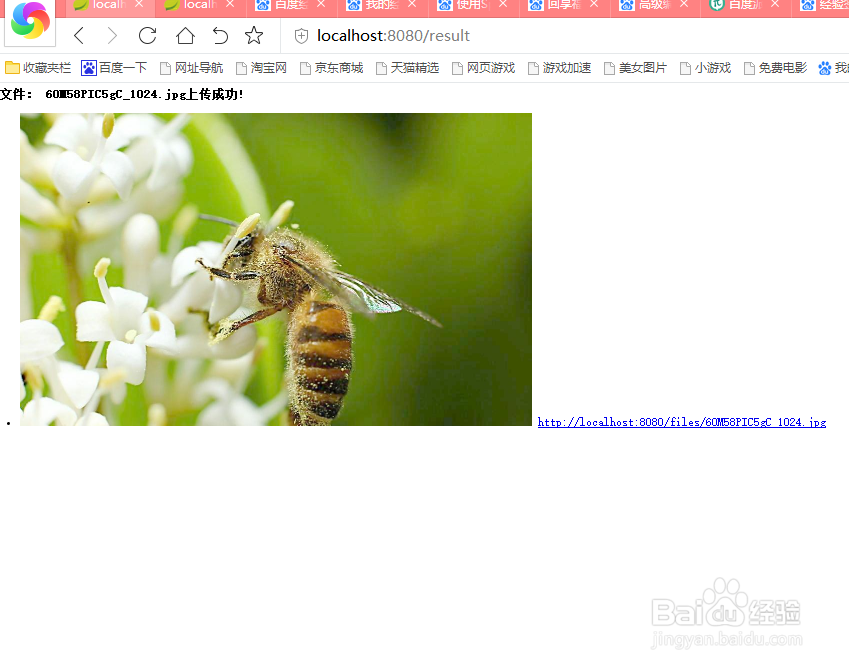
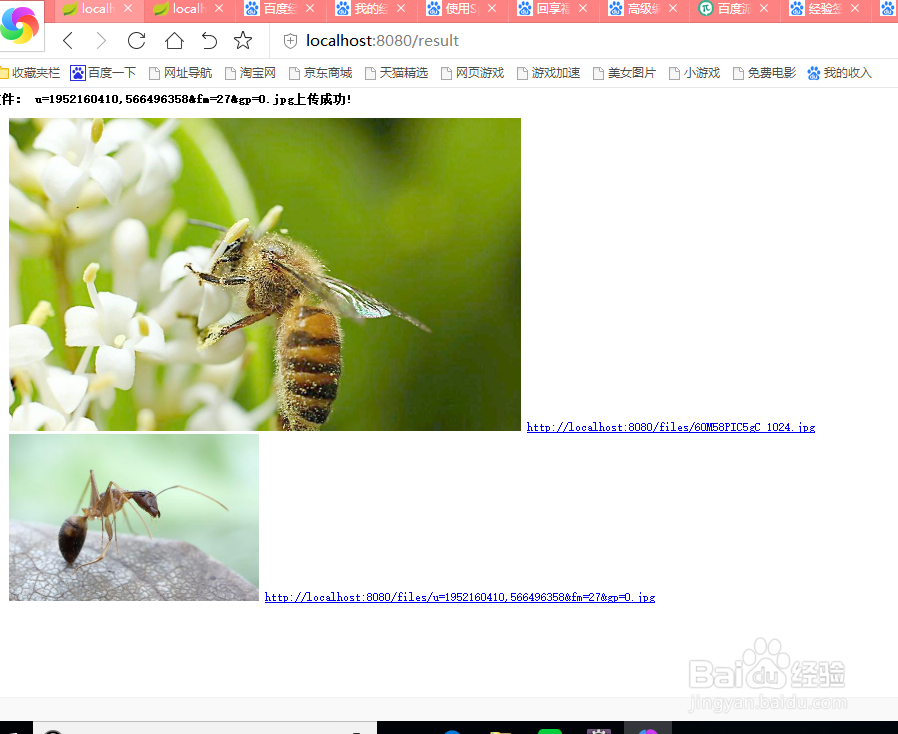
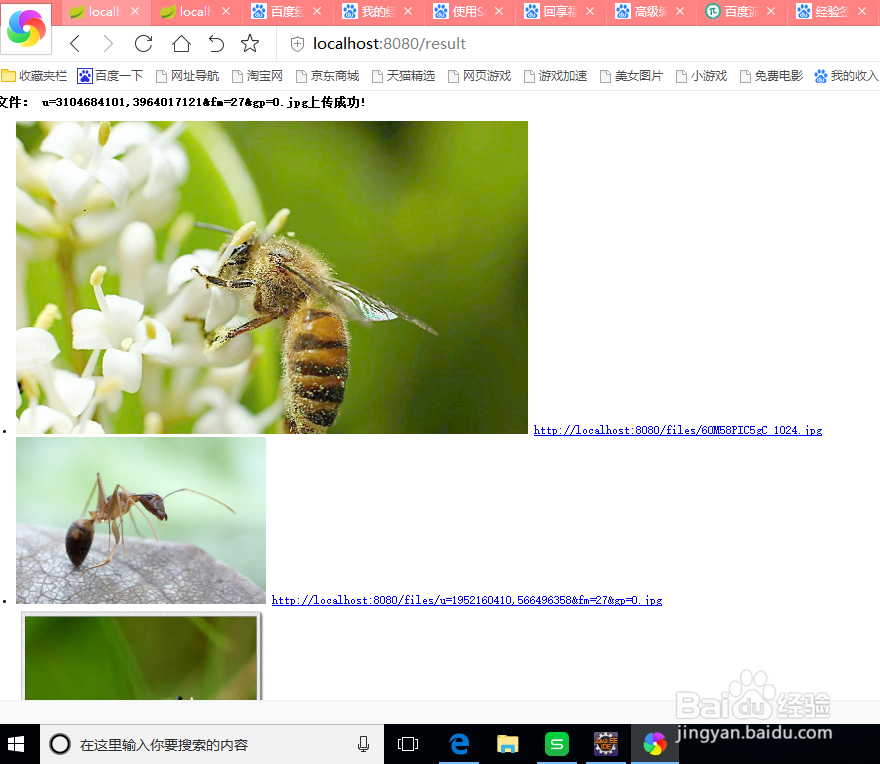
3、进行测试Restful服务前,需要使用之前的 《Spring MVC/Spring Boot实现图片文件上传和显示》案例经验,进行文件的上传操作1)运行Application.java启动Spring boot容器框架2)在浏览器中输入URL地址:http://localhost:8080/upload 进行图片文件的上传操作3)连续上传3张照片
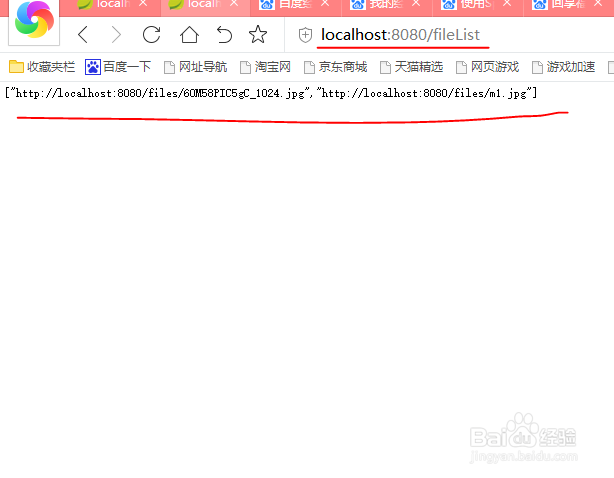
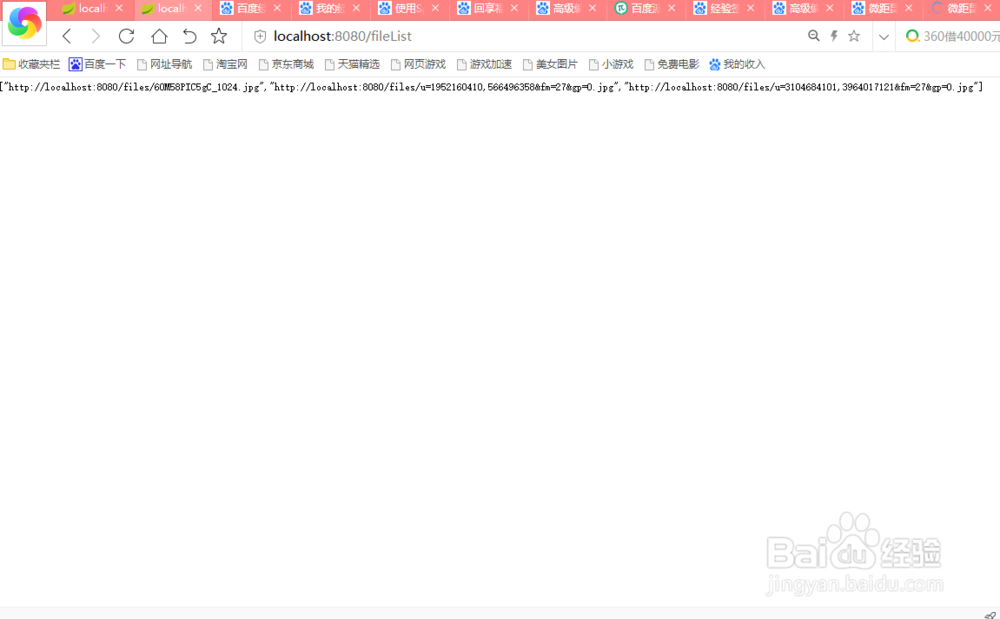
4、使用步骤2)创建的Restful服务获取步骤3上传的文件列表,进行Restful服务消费1)在浏览器URL地址栏中输入restful的地址:http://localhost:8080/fileList可以看到页面的返回结果["http://localhost:8080/files/60M58PIC5gC_1024.jpg","http://localhost:8080/files/u=1952160410,566496358&fm=27&gp=0.jpg","http://localhost:8080/files/u=3104684101,3964017121&fm=27&gp=0.jpg"]
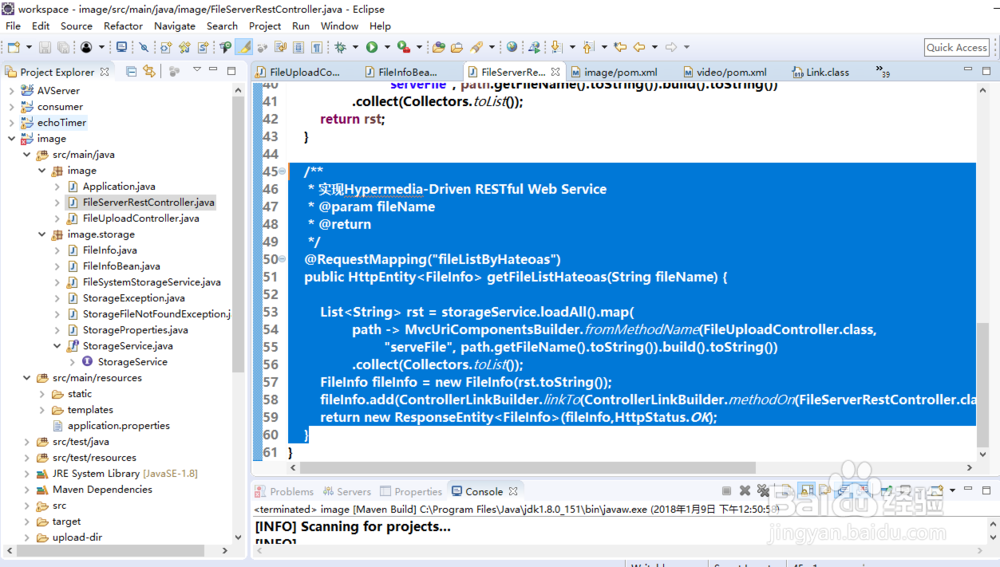
5、使用Spring boot实现超媒体数据结构的RESTful Web Service:在FileServerRestController控制器中增加一下方法:/** * 实现Hypermedia-Driven RESTful Web Service * @param fileName * @return */ @RequestMapping("fileListByHateoas") public HttpEntity<FileInfo> getFileListHateoas(String fileName) { List<String> rst = storageService.loadAll().map( path -> MvcUriComponentsBuilder.fromMethodName(FileUploadController.class, "serveFile", path.getFileName().toString()).build().toString()) .collect(Collectors.toList()); FileInfo fileInfo = new FileInfo(rst.toString()); fileInfo.add(ControllerLinkBuilder.linkTo(ControllerLinkBuilder.methodOn(FileServerRestController.class).getFileListHateoas(fileName)).withSelfRel()); return new ResponseEntity<FileInfo>(fileInfo,HttpStatus.OK); }
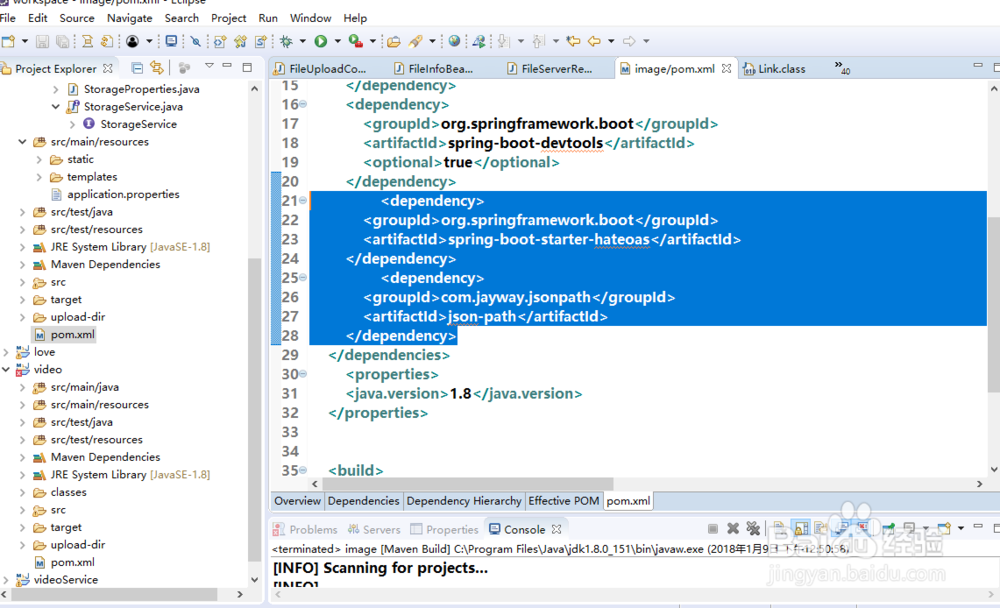
6、使用Spring boot实现超媒体数据结构的RESTful Web Service:同时需要在maven工程中增加spring-boot-starter-hateoas和json-path包依赖 <dependency> <groupId>org.springframework.boot</groupId> <artifactId>spring-boot-starter-hateoas</artifactId> </dependency> <dependency> <groupId>com.jayway.jsonpath</groupId> <artifactId>json-path</artifactId> </dependency>
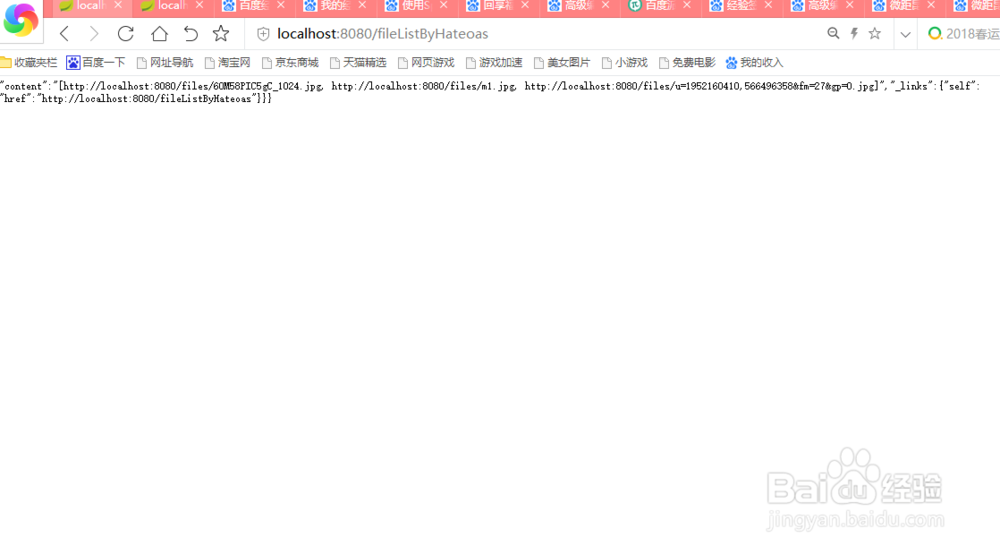
7、使用Spring boot实现超媒体数据结构的RESTful Web Service:测试在浏览器中输入:http://localhost:8080/fileListByHateoas可以看到页面的输出结果:{"content":"[http://localhost:8080/files/60M58PIC5gC_1024.jpg, http://localhost:8080/files/m1.jpg, http://localhost:8080/files/u=1952160410,566496358&fm=27&gp=0.jpg]","_links":{ "self":{ "href":"http://localhost:8080/fileListByHateoas" } }}